Rehab & Taping
If you are going to be around horses and rodeo, at one time or another you are going to get banged up. The following pages consist of some basic medical knowledge regarding the recognition and treatment of many of our commonly seen injuries. We have even given you some general information on Nutrition and Supplements you can use at home and on the road for those who have a hectic schedule.
While we by no means intend for this to be a detailed medical text, we enlisted the help of many medical colleagues within the Justin Boots Sportsmedicine Program to get you the most up-to-date help. Please consult a medical professional to get much more detailed information on any or all of these areas.
We will devote a lot of articles and information to helping you be more physically fit and flexible, with specialty work for specific events, so check back often as we update these files and tips.

Exercises
Advanced: Upper Extremity
Bicep Curls
Start with elbows straight at sides, and then bend elbows upward to your chest. Can also perform alternating or with one side only.Perform 3 time 15 repetitions.
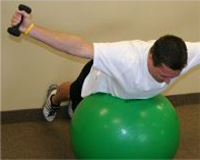
Single Leg Balance-Bicep Curls
Stand on one leg. Start with your arms down at your sides and your palms facing outwards. Then bend your elbows upward to your chest. Can also perform alternating or one side only like in the third and forth picture.Perform 3 sets of 15 repetitions.
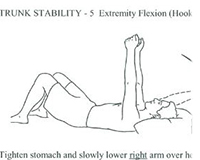
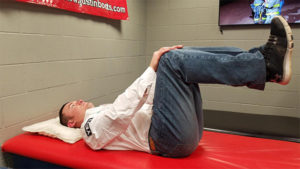
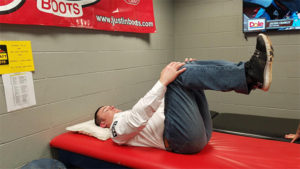
Basic Core Exercises
When you hear the term “core,” abdominal muscles may immediately come to mind. However, the core actually comprises much more than just the abs. The core includes all the deep and superficial muscles used to stabilize, align, and move the trunk of the body as well as the pelvis and hips.The core is where the body’s center of gravity is located, and is the root source of all movement whether we’re talking about trunk movement or movement of the extremities.

Basic Lower Extremity
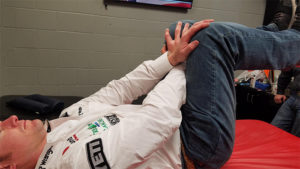
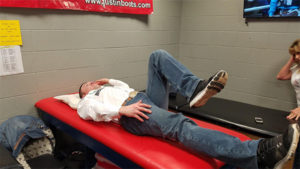
Supporting left thigh behind knee, slowly straighten knee until stretch is felt in back of thigh. Hold 30 seconds. Lying on floor with left leg on wall, other leg through doorway, scoot buttocks toward wall until stretch is felt in back of thigh. As leg relaxes scoot closer to wall hold 30 seconds. Pull left knee toward opposite shoulder. Hold 30 seconds. Relax. With left leg hanging over side of bench, other knee to chest relax leg as much as possible. Hold 30 seconds. Relax.

Basic Upper Extremity
Facing anchor , tubing around the right hand, elbow bent 90 degrees, forearm forward, pull forearm back, keeping elbow bent. Repeat 20 times per set. Do 3 sets per session. Do 1 session per day. Hold tubing in left hand, elbow at side and forearm across body. Rotate forearm out. Repeat 20 times per set. Do 3 sets per session. Do 1 session per day. Hold tubing in left hand, elbow at side and forearm out. Rotate forearm in across body. Peat 20 times per set. Do 3 sets per session. Do 1 session per day.
Taping and Bracing

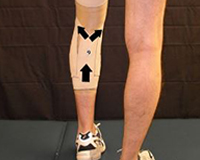
Taping for the MCL Injured Knee
Tips: Always remember to keep the knee bent to approximately 15 degrees (this is easier to maintain with a one inch object under the heel-for example, the cap to the adhesive spray). The more you stretch the tape when applying the strips, the tighter the tape job will be. When going around the thigh or calf be sure to tighten (contract) those muscles. This will decrease the likelihood of making the tape job too tight and causing the underlying muscles to cramp. Spreading baby powder over a completed tape job will help prevent it from binding with your jeans.
Taping for the PCL Injured Knee
Always remember to keep the knee bent to approximately 15 degrees (this is easier to maintain with a one inch object under the heel–for example, the cap to the adhesive spray) The more you stretch the tape when applying the strips, the tighter the tape job will be. When going around the thigh or calf be sure to tighten (contract) those muscles. This will decrease the likelihood of making the tape job too tight and causing the underlying muscles to cramp. Spreading baby powder over a completed tape job will help prevent it from binding with your jeans.
Taping for the ACL Injured Knee
Tips: Always remember to keep the knee bent to approximately 15 degrees (this is easier to maintain with a one inch object under the heel-for example, the cap to the adhesive spray).
The more you stretch the tape when applying the strips, the tighter the tape job will be. When going around the thigh or calf be sure to tighten (contract) those muscles. This will decrease the likelihood of making the tape job too tight and causing the underlying muscles to cramp. Spreading baby powder over a completed tape job will help prevent it from binding with your jeans.
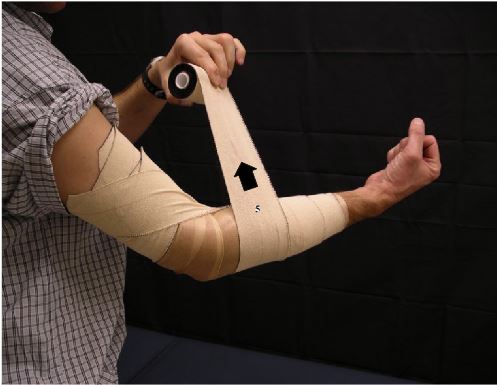
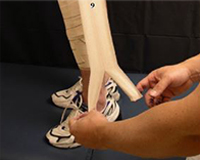
Hyper Extended Elbow
Tips: Always remember to keep the elbow bent to approximately 30 degrees (as shown in Figure 1). When taping around the Biceps and Forearm, be sure to tighten (contract those muscles. This will decrease the likelihood of making the tape job too tight and causing the underlying muscles to cramp or the hand to go numb. When the tape job is done and you attempt to forcefully straighten the arm, the tape should stop your elbow just short of going straight (approx. 10 degrees.) When taping an elbow, keep the hand/wrist in the position it will be used in your event, i.e. thumb up in Bareback Riding and thumb out in bullriding.
Hip and Pelvis
Treatment For Lumbosacral and Hip Dysfunction
Treatment For Lumbosacral & Hip Dysfunction Lliopsoas ORIGIN: Lateral surface of the lumbar vertebrae (T12-L5) INSERTION: Lesser trochanter of the femur ACTION: Main hip flexor & assists in external rotation of the hip NERVE/MYOTOME: anterior rami off the lumbar plexus at the levels of L1-L3 ARTERY: Lumbar
Stretches For Lumbosacral & Hip Dysfunction
Home Stretch Program For Lumbosacral & Hip Dysfunction Foam Roller TP Home Program For Lumbosacral & Hip Dysfunction Trigger Point Ball Home Program For Lumbosacral & Hip Dysfunction Home Mobilization Program For Lumbosacral & Hip Dysfunction

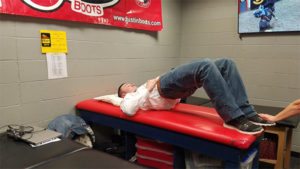
Pelvic Stablization


Pre Ride Warm Up
General Health Information
Diet
Nutrition Made Easy It is the intent of this chapter to help you understand the basics of nutrition. You will understand how proteins, fats, and carbohydrates work together to provide you with a well rounded nutritional program. Also in this chapter you will be given a list

Supplements
Supplements A common question we get asked by everyone trying to improve themselves or their performance is “does brand x supplement really work”? To give you a little background knowledge, In 1994 , Congress enacted the Dietary Supplement Health and Education Act, or DSHEA, which set up