Elastikon Elbow Tape Job
Supplies you will need:
- Can of adhesive spray
- 1 roll of pre-wrap/underwrap
- 1 to 2 roll of 3″ Elastikon or AC+tape
- Bandage Scissors
- Dehesive
Tips:
- Always remember to keep the elbow bent to approximately 30 degrees (as shown in Figure 1).
- When taping around the Biceps and Forearm, be sure to tighten (contract those muscles. This will decrease the likelihood of making the tape job too tight and causing the underlying muscles to cramp or the hand to go numb.
- When the tape job is done and you attempt to forecefull straighten the arm, the tape should stop your elbow just short of going straight (approx. 10 degrees.)
- When taping an elbow, keep the hand/wrist in the position it will be used in your event, i.e. thumb up in Bareback Riding and thumb out in bullriding.
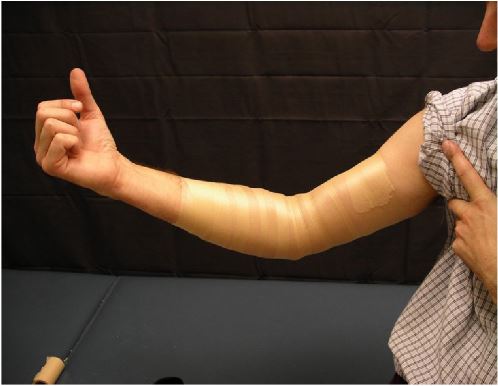
Figure 1: After applying adhesive to the arm, bend the elbow to approximately 30 degrees of flexion and cover the arm with under wrap from just above the mid-upper arm to just below the mid-forearm.
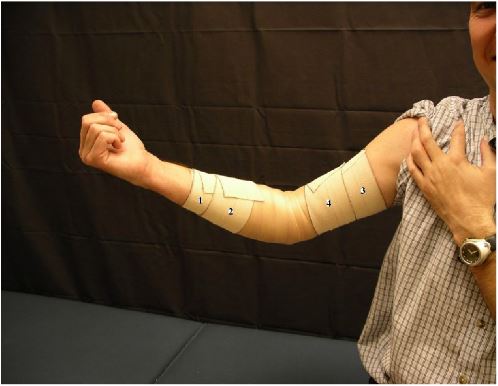
Figure 2: Keeping the forearm tight, apply two anchor strips around the forearm with slight overlap (Strips #1 & 2). Keeping the biceps tight apply two anchor strips around the upper arm (Strips #3 & 4). If you are in a sweaty enviroment, you can prevent slippage by adhering 1/2″ of the tape directly to the skin.

Figure 3: Starting Strip #4 at the outside of the upper arm, pull it down across the front of the elbow and continue down the under forearm. **Keep elbow at approximately 30 degrees of flexion.
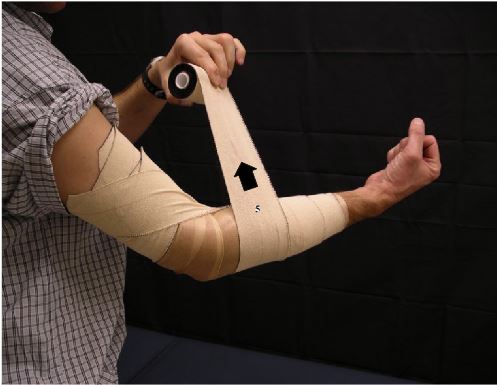
Figure 4: Continue pull strip #5 around the forearm and back accross the front of the elbow.
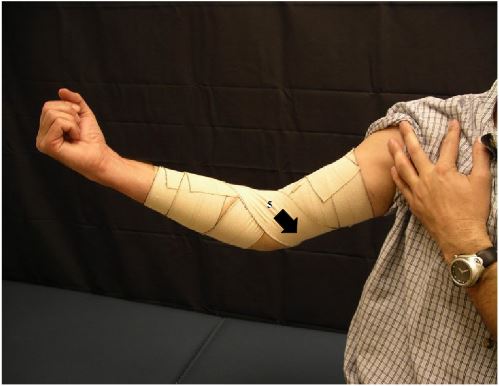
Figure 5: Continue Strip #5 around the inside of the upper arm and then around the back of the arm.
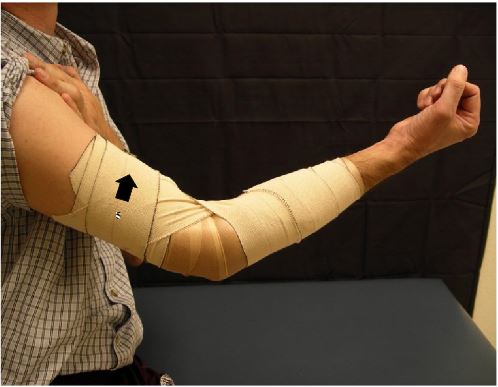
Figure 6: After coming around behind the upper arm, pull Strip #5 up and over the biceps and cut the tap. Now repeat Strip #5 one to two more times.
**If there is no Medial Collateral Ligament involvement, go next to Figure 9.
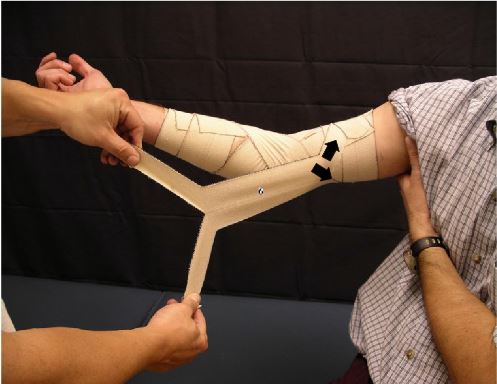
Figure 7: For Medial Collateral Ligament involvement–Cut off a piece of tape approximately 1 1/2 ft. in length and split both ends (Strip #6). Place one end on the inside of the upper arm and pull the split pieces around the top and bottom to secure. Pull the tape tight along the inside of the elbow, being sure that the middle of the tape crosses over the boney prominence on the inside of the elbow.
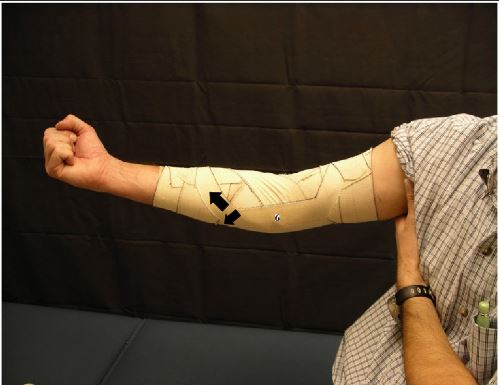
Figure 8: Continue pulling Strip #6 tight and secure the other set of split ends around the top and bottom of the forearm.
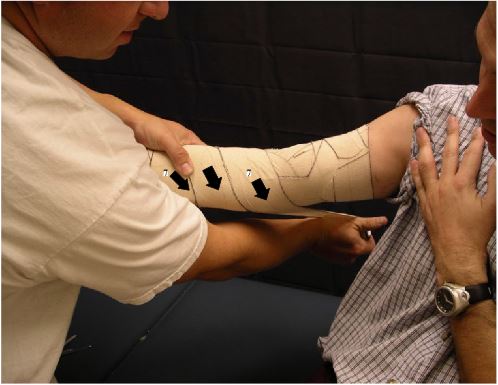
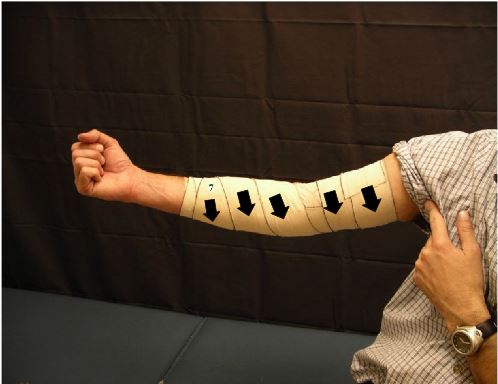
Figure 9: Starting at the bottom of the forearm, cover the tape job by spiraling up the forearm (Strip #7). When you get to the elbow, the middle of the tape should cross over the boney prominence on the inside of the elbow.
Figure 10: Continue Strip #7 over the inside of the elbow and continue spiraling up and over the upper arm.
Taping the Hyperextended Elbow
Supplies you will need:
- Can of adhesive spray
- 1 roll of pre-wrap/underwrap
- 2 rolls of 1 1/2″ J & J Coach (white) tape
- Bandage Scissors
- Dehesive
Tips:
- Always remember to keep the elbow bent to approximately 30 degrees (as shown in Figure 1).
- When taping around the Biceps and Forearm, be sure to tighten (contract those muscles. This will decrease the likelihood of making the tape job too tight and causing the underlying muscles to cramp or the hand to go numb.
- When the tape job is done and you attempt to forecefull straighten the arm, the tape should stop your elbow just short of going straight (approx. 10 degrees.)
- When taping an elbow, keep the hand/wrist in the position it will be used in your event, i.e. thumb up in Bareback Riding and thumb out in bullriding.

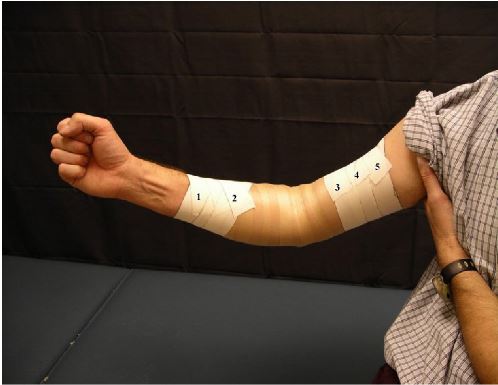
Figure 1: After applying adhesive to the arm, bend the elbow to approximately 30 degrees of flexion and cover the arm with underwrap from just above the mid-upper arm to just below the mid-forearm.
Figure 2: Keeping the forearm tight, apply two anchor strips around the forearm with slight overlap (Strips #1 & 2). Keeping the Biceps tight, apply three anchor strips around the upper arm (Strips #3, 4 & 5). If you are in a sweaty environment, you can prevent slippage by adhearing 1/2″ of the tape directly to the skin.
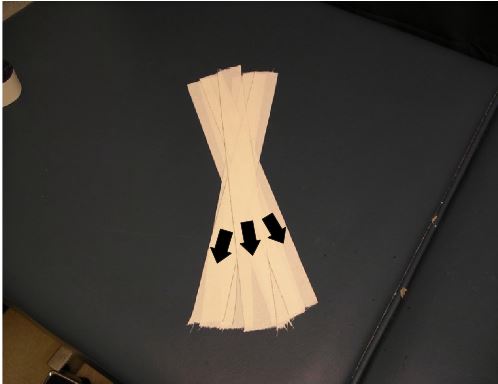
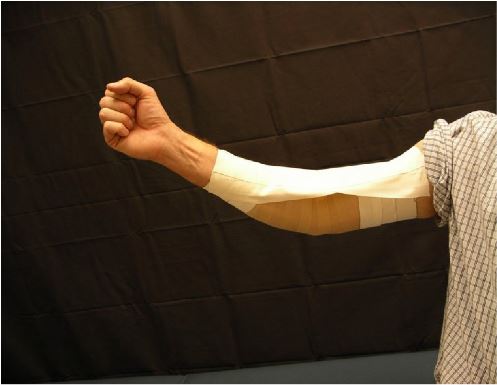
Figure 3: On a table or chair, make a fan pattern with 6-7 pieces of tape-approximately 12-16″ long.
Figure 4: Apply the fan strip to the fron t of the elbow by attaching one end to the anchor strips on the forearm and the other end ot the anchor strips on the biceps (keep elbow bent at 30 degrees throughout).
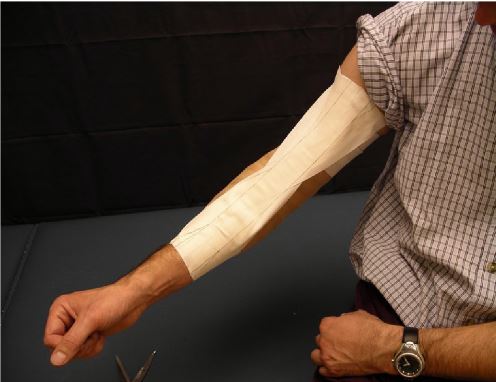
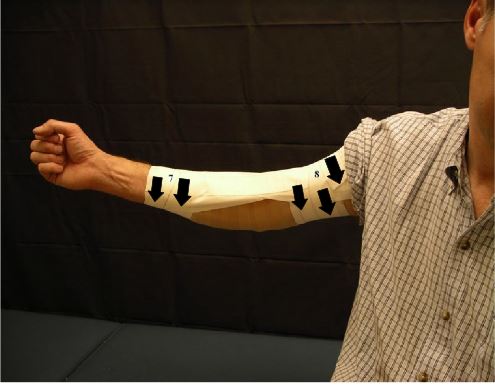
Figure 5: Make sure the fan strip crosses through/over the middle of the elbow.
Figure 6: Tie down the ends of the “fan” by applying more anchor strips over the top of them. (Strips #7 & 8).
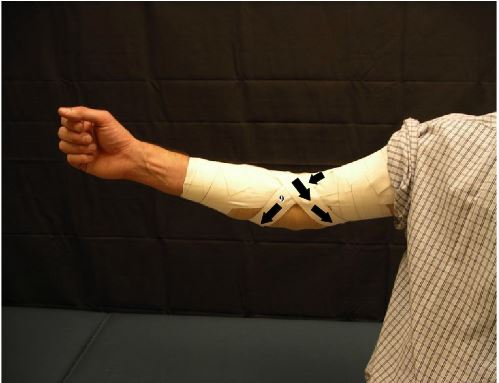
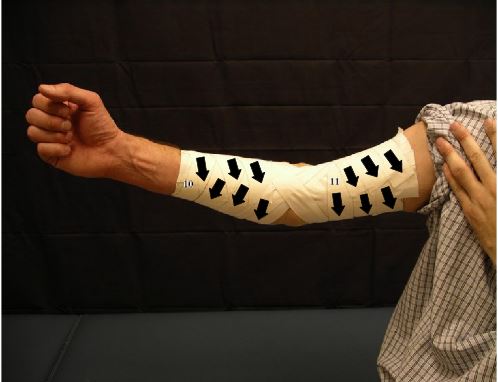
Figure 7: “Figure 8”–Perform a figure “8” around the elbow with a continuous strip (Sript #9). Start at the front of the elbow, going down acros the inside forearm, around behind the outside forearm and crossing the middle (front) of the elbow. Then continue around behind the inside of the upper arm to the outside of the upper arm and crossing back over the iddle of the elbow again. Repeat the figure “8” three to four more times.
Figure 8: Finish the tape job by applying cover strips to the forearm (Strip #10) and the biceps (Strip #11).
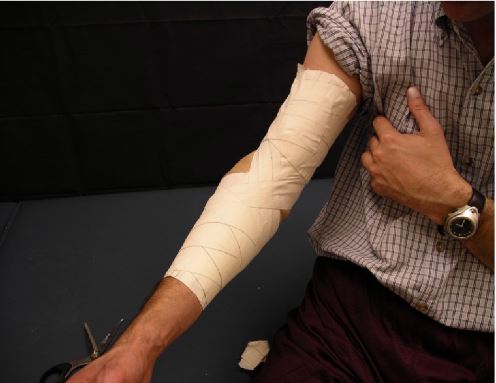
Figure 9: The Finished tape job should keep the elbow from extending completely straight.
Download the PDF version HERE