Taping for the ACL Injured Knee
Supplies You Will Need
- Can of adhesive spray
- 1 roll of pre-wrap/underwrap
- 3 rolls of J & J Elastikon (3″) or AC Plus Tape (3″)
- Bandage scissor
- Dehesive
- ***JAS rodeo brace optional
Tips:
- Always remember to keep the knee bent to approximately 15 degrees (this is easier to maintain with a one inch object under the heel-for example, the cap to the adhesive spray).
- The more you stretch the tape when applying the strips, the tighter the tape job will be.
- When going around the thigh or calf be sure to tighten (contract) those muscles. This will decrease the likelihood of making the tape job too tight and causing the underlying muscles to cramp.
- Spreading baby powder over a completed tape job will help prevent it from binding with your jeans.
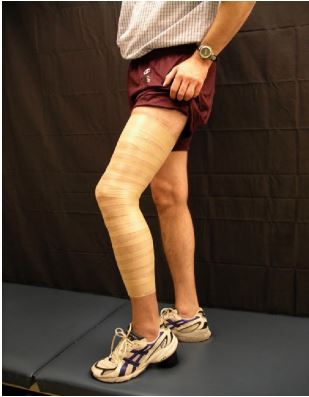
Figure 1: After applying adhesive spray to the leg, bend the knee to approximately 15 degrees of flexion and cover the leg with under-wrap from just above mid-thigh to just below mid-calf.
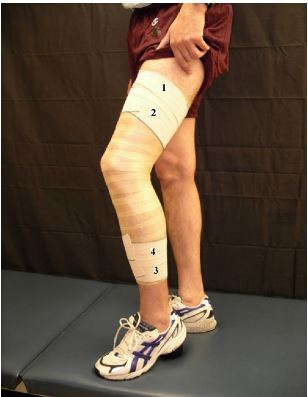
Figure 2: Keeping the thigh tight, apply two anchor strips around the thigh with slight overlap (Strip #’s 1 & 2). Keeping the calf tight, apply two anchor strips around the calf with slight overlap (Strip #’s 3 & 4). If you are in a sweaty environment you can prevent tape slippage by adhering 1/2 inch of the tape directly to the skin.
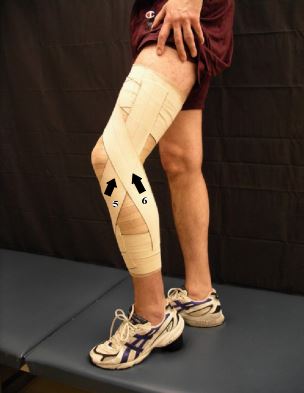
Figure 3: “Lateral X”-Strip #5 starts from the inside of the calf on the anchor strips, then croses the shin passing the middle/outside of the knee, and finishes on the outside of the thigh anchor strips. Strip #6 goes from the outside and back of the calf anchor strips upward crossing the middle/outside of the knee, continuing over the front of the thigh, and finishes on the top/inside of the thigh anchor strips.
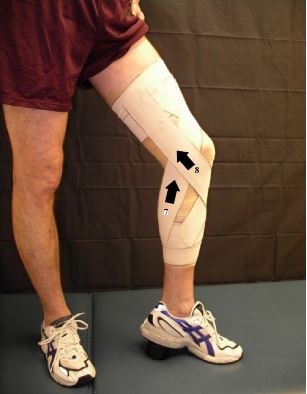
Figure 4: “Medial X”–Strip #7 starts from the inside back of the calf anchors, upward across the middle/inside of the knee, then crossing the front of the thigh and finishing on the top/outside of the thigh anchor strips. Strip #8 starts at the outside front of the calf anchor strips, passes across the shin and the middle/inside of the knee, and finishes on the inside of the thigh anchor strips.
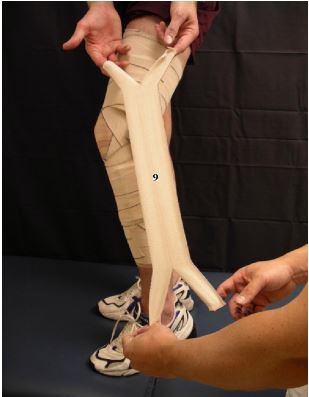
Figure 5: “Back Split”–Cut a piece of tape about 2 1/2 feet long and split each end down the middle about 4 to 5 inches. (If you cut a little slit in the end of the tape with scissors to get you started you can then take each side of the tape and pull outward to tear the split as far as needed.)
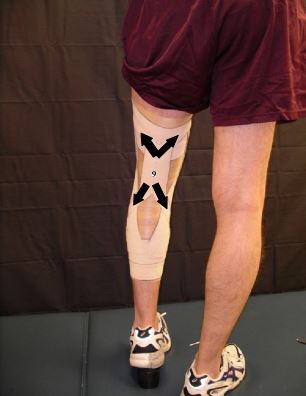
Figure 6: Applying the Back Split (Strip#9). From behind the leg., take the two ends of the top split around towards the fron of the thigh. Then pulling the tape downward to remove the stretch, take the ends of the bottom split around towards the front of the calf/shin. (Be sure to keep the knee slightly bent.)
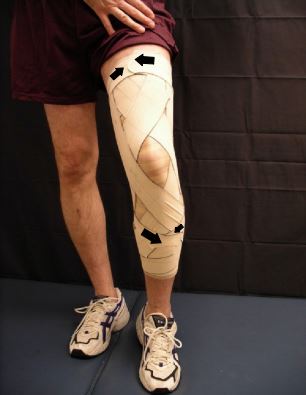
Figure 7: Front view of “Back Split”. The split ends should cross the thigh and shin as pictured.
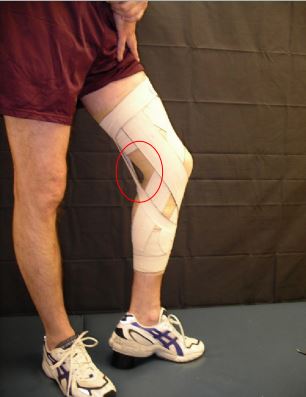
Figure 8: Side view of “Back Split”. If the tape was puled tight and the knee kept bent at approximately 15 degrees, there should be a little gap between the tape and the back of the knee.
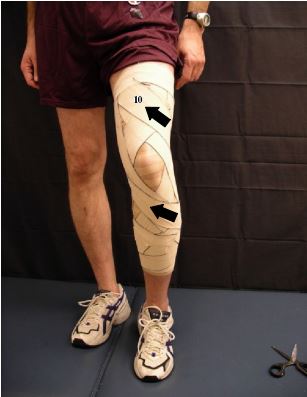
Figure 9: “Barber Pole A”–Strip #10 starts on the outside/back of the calf, crosses over the shin and around behind the knee (this strip should press Strip #9 into the back of the knee–removing the gap), then up around the outside of the thigh, and finishes at the top/inside of the thigh.
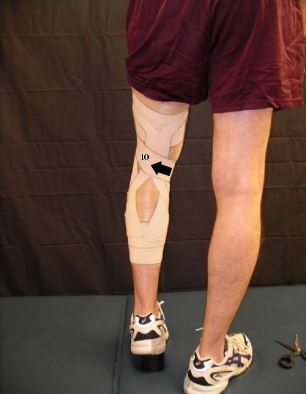
Figure 10: Back view of “Barber Pole A”.
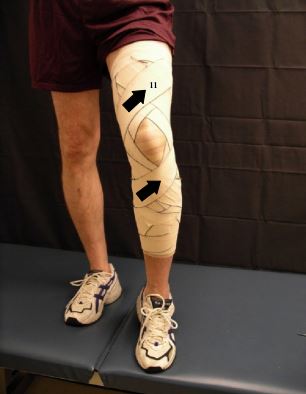
Figure 11: “Barber Pole B”–Strip #11 starts on the inside back of the calf and continues up and across the shin. It then goes around behind the knee and up across the inside of the thigh, and finishes at the top/outside of the thigh.
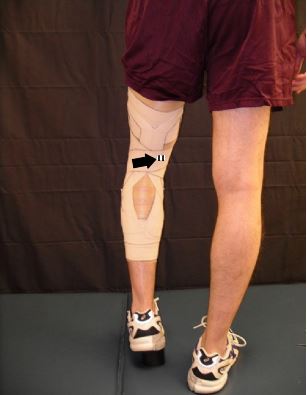
Figure 12: Back view of “Barber Pole B”. ***At this point if you are not using the rodeo brace, you would finish the tape job by repeating the four anchor strips, two on the thigh and two on the calf, as shown in Figure 2.
Addition of Rodeo Brace
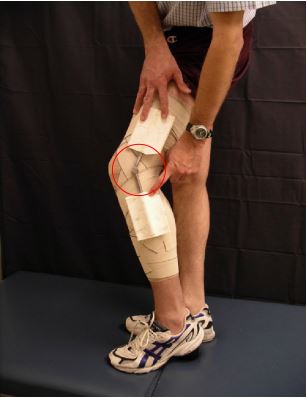
Figure 13: Make sure the pivot/hinge of the brace is exactly at the outside, mid-point of the knee joint.
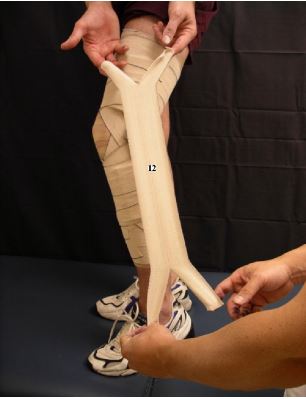
Figure 14: For Strip #12, cut a piece of tape approximately 2 feet in length and split each end in the middle lengthwise (as seen in Figure 5)
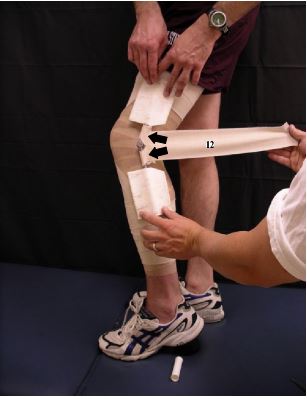
Figure 15: Hook the split pieces of one end of Strip #12 around the rodeo brace, just above and below the hinging point, and stick the ends back onto the tape. At this point you, or the person being taped, will need to hold the other end of Strip #12 out of the way (or temporarily stick it out of the way), until after the steps in Figure 16 take place.

Figure 16: Starting at the bottom of the brace, circle Strip #13 around the shin and calf, anchoring the bottom paddle securely to the leg. Starting at the lower edge of the upper paddle, circle Strip #14 around the thigh, anchoring the upper paddle to the leg as well.
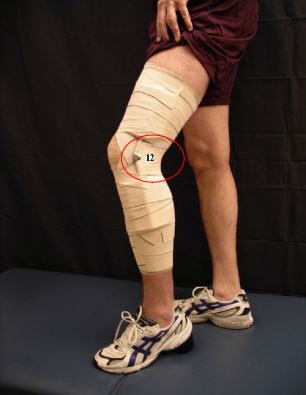
Figure 17: After Strips #13 and #14 have been applied, pull the loose end of Strip #12 (shown on the right side of Figure 15 above) tight around behind the knee.
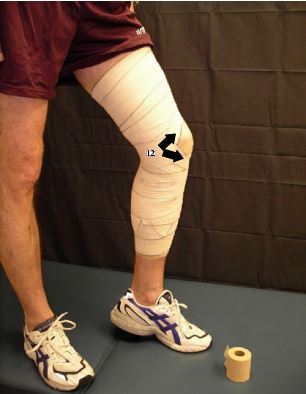
Figure 18: Pull Strip #12 up tight over the inside of the knee and wrap the split ends across the front of the leg, above and below the kneecap.
Click HERE to download PDF